Overview
Monitor provides a user-friendly interface for managing your webhook configurations. Admin and Developer users can create, view, update, and delete webhook configurations directly through the portal, eliminating the need to use API endpoints for basic webhook management.Only users with Admin or Developer roles can access webhook management features in Monitor. Contact your account administrator if you need access.
Accessing Webhook Management
- Log into Monitor: Visit monitor.orum.io and sign in with your credentials
- Navigate to Webhooks: From the main navigation header, select Developer Tools > Webhooks
- View Webhook Dashboard: The webhook management interface displays all your configured webhooks
Create New Webhook
1
Start Configuration
Click the “Create Webhook” button on the webhook dashboard to open the configuration form.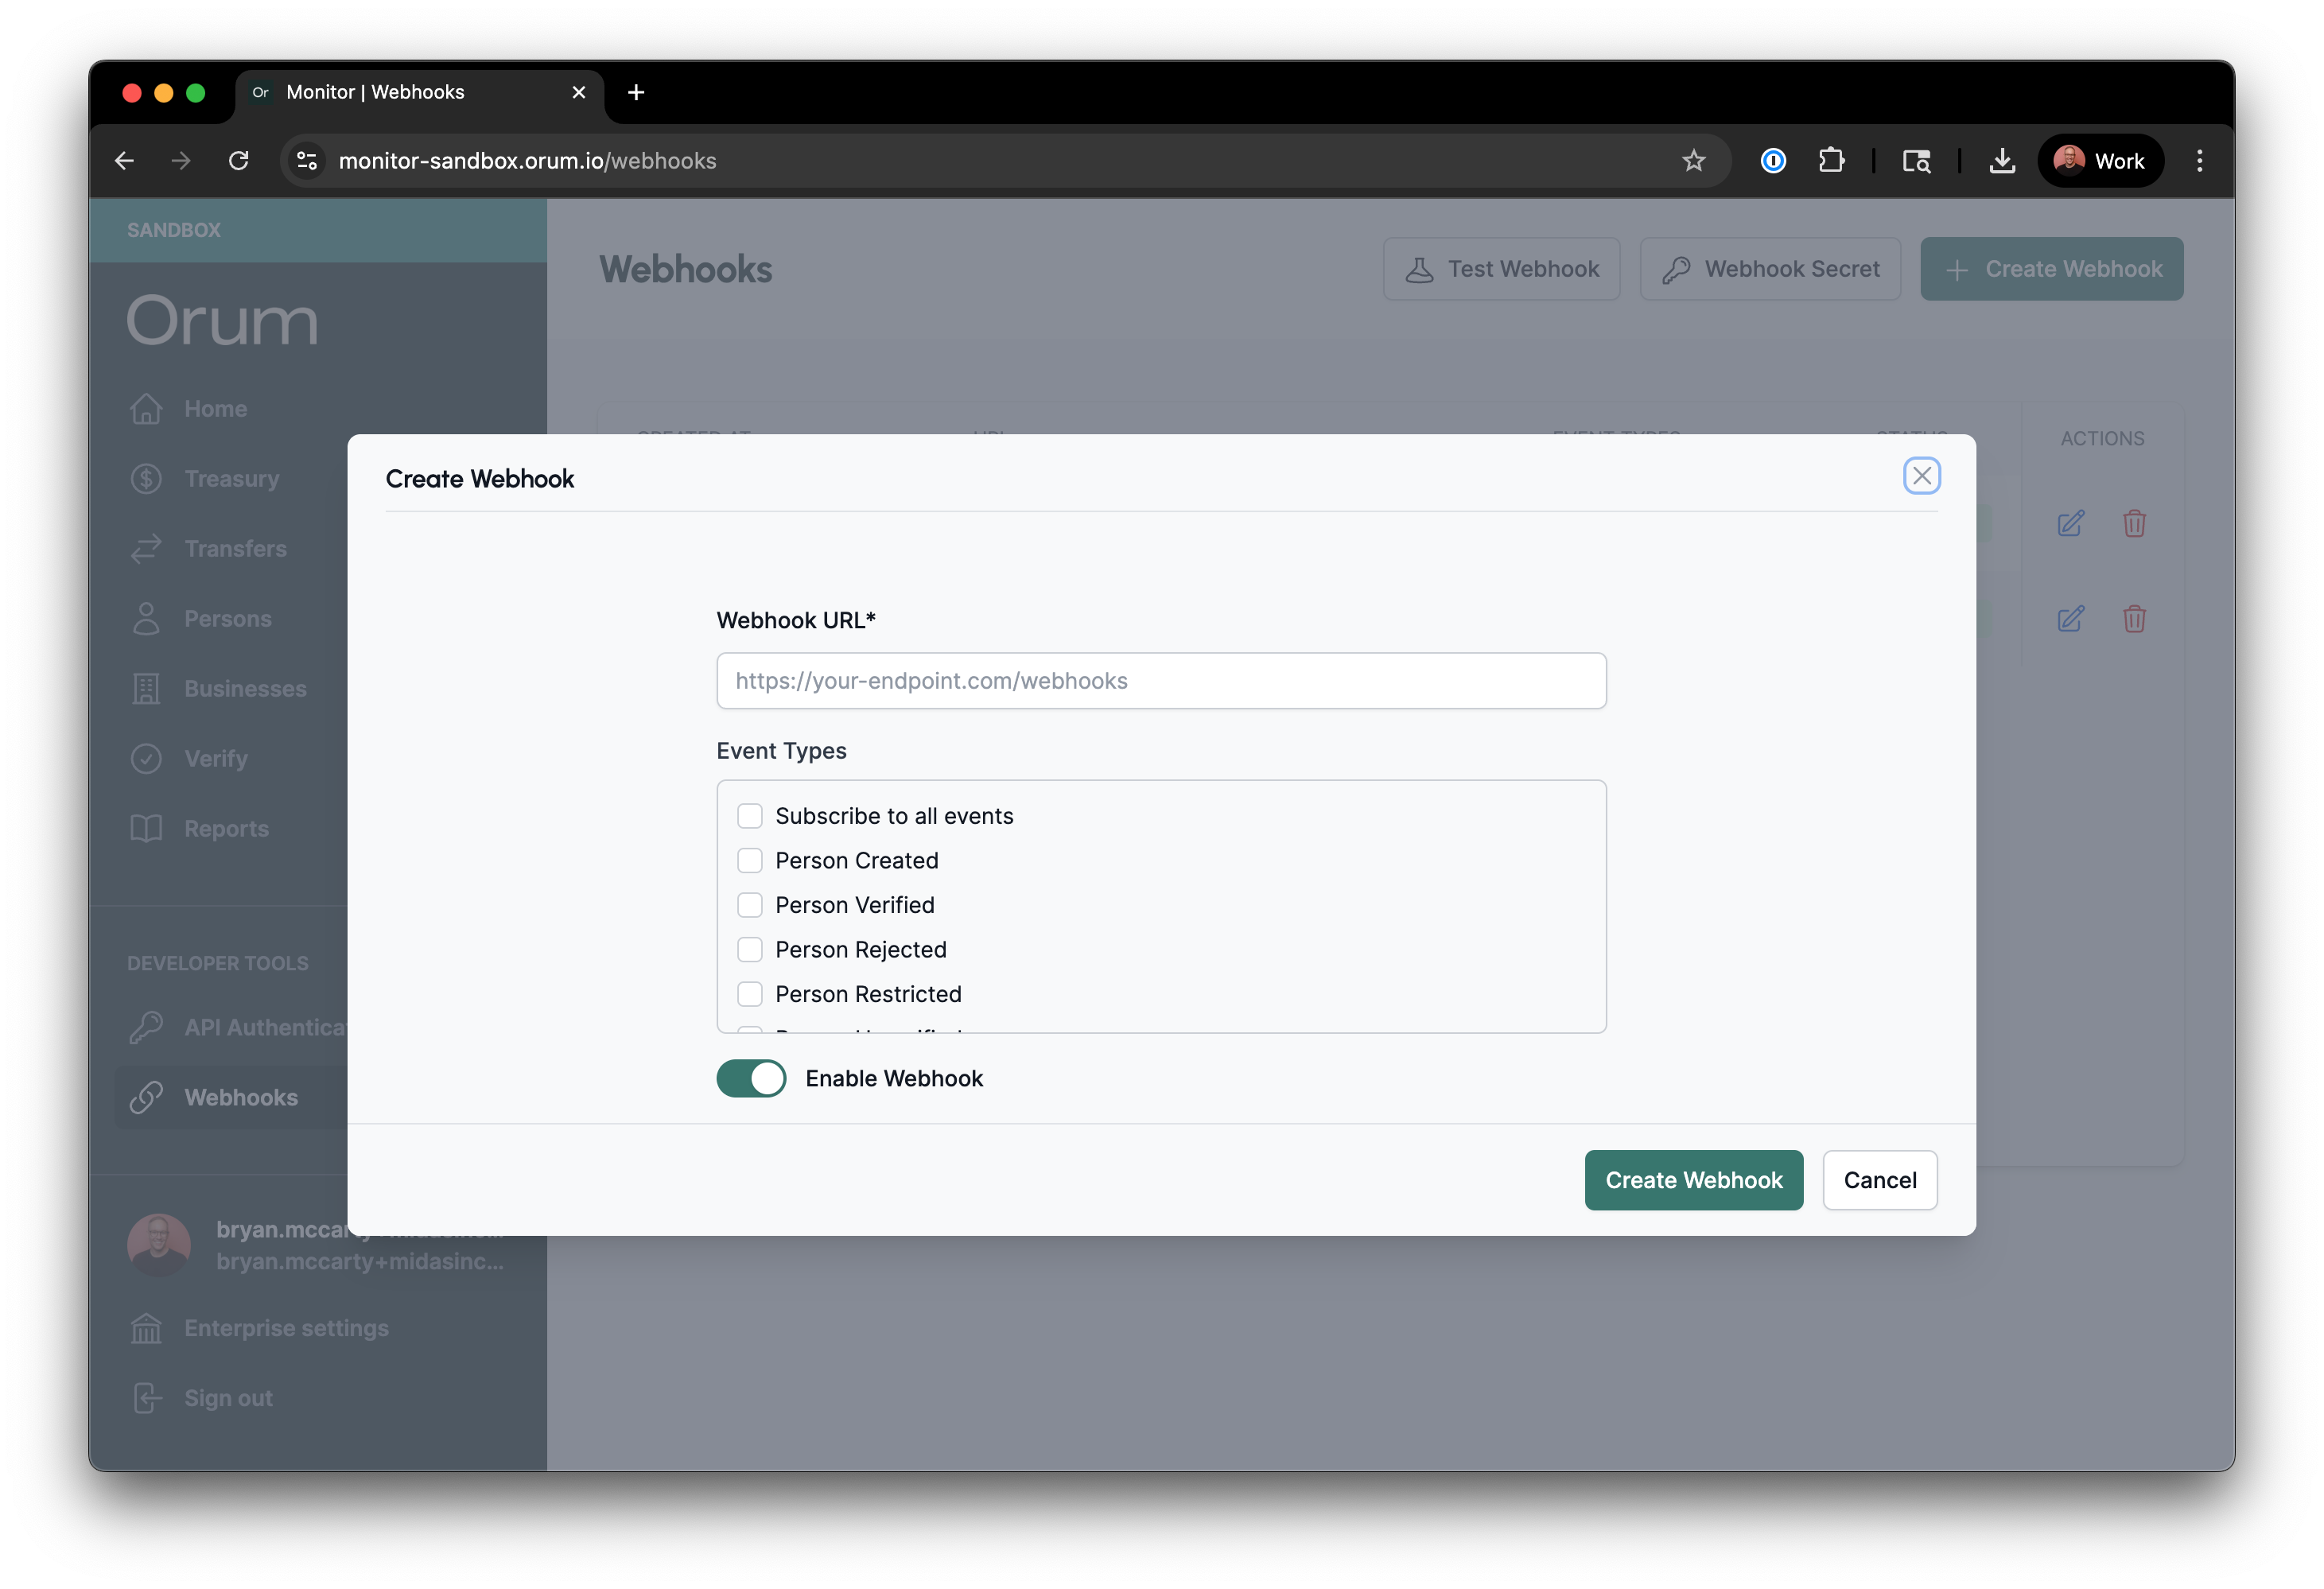
2
Configure Basic Settings
URL Configuration:
- Enter your webhook endpoint URL in the Webhook URL field
- Ensure the URL is accessible and can receive POST requests
- The URL must use HTTPS
- Choose which event types you want to subscribe to:
- Subscribe all (subscribes to all event types)
- Person events (created, verified, rejected, restricted, unverified, closed)
- Business events (created, verified, rejected, restricted, unverified, closed)
- External account events (created, verified, rejected, restricted, unverified, closed)
- Transfer events (updated)
- Verification events (verify_account_updated)
- Subledger events (created)
- Book transfer events (updated)
3
Save and Activate
- Ensure the Enable Webook toggle is on (shows green)
- Click “Create Webhook” to save and activate the configuration
- Your webhook will immediately start receiving events for selected types
Test Webhook Endpoint
1
Start Test
Use the “Test Webhook” button and select an event type that your endpoint is subscribed to
2
Send Test Event
Click the “Send Test Event” button. An example webhook event is triggered in the structure that you would expect for the selected event type to be sent to your configured endpoint.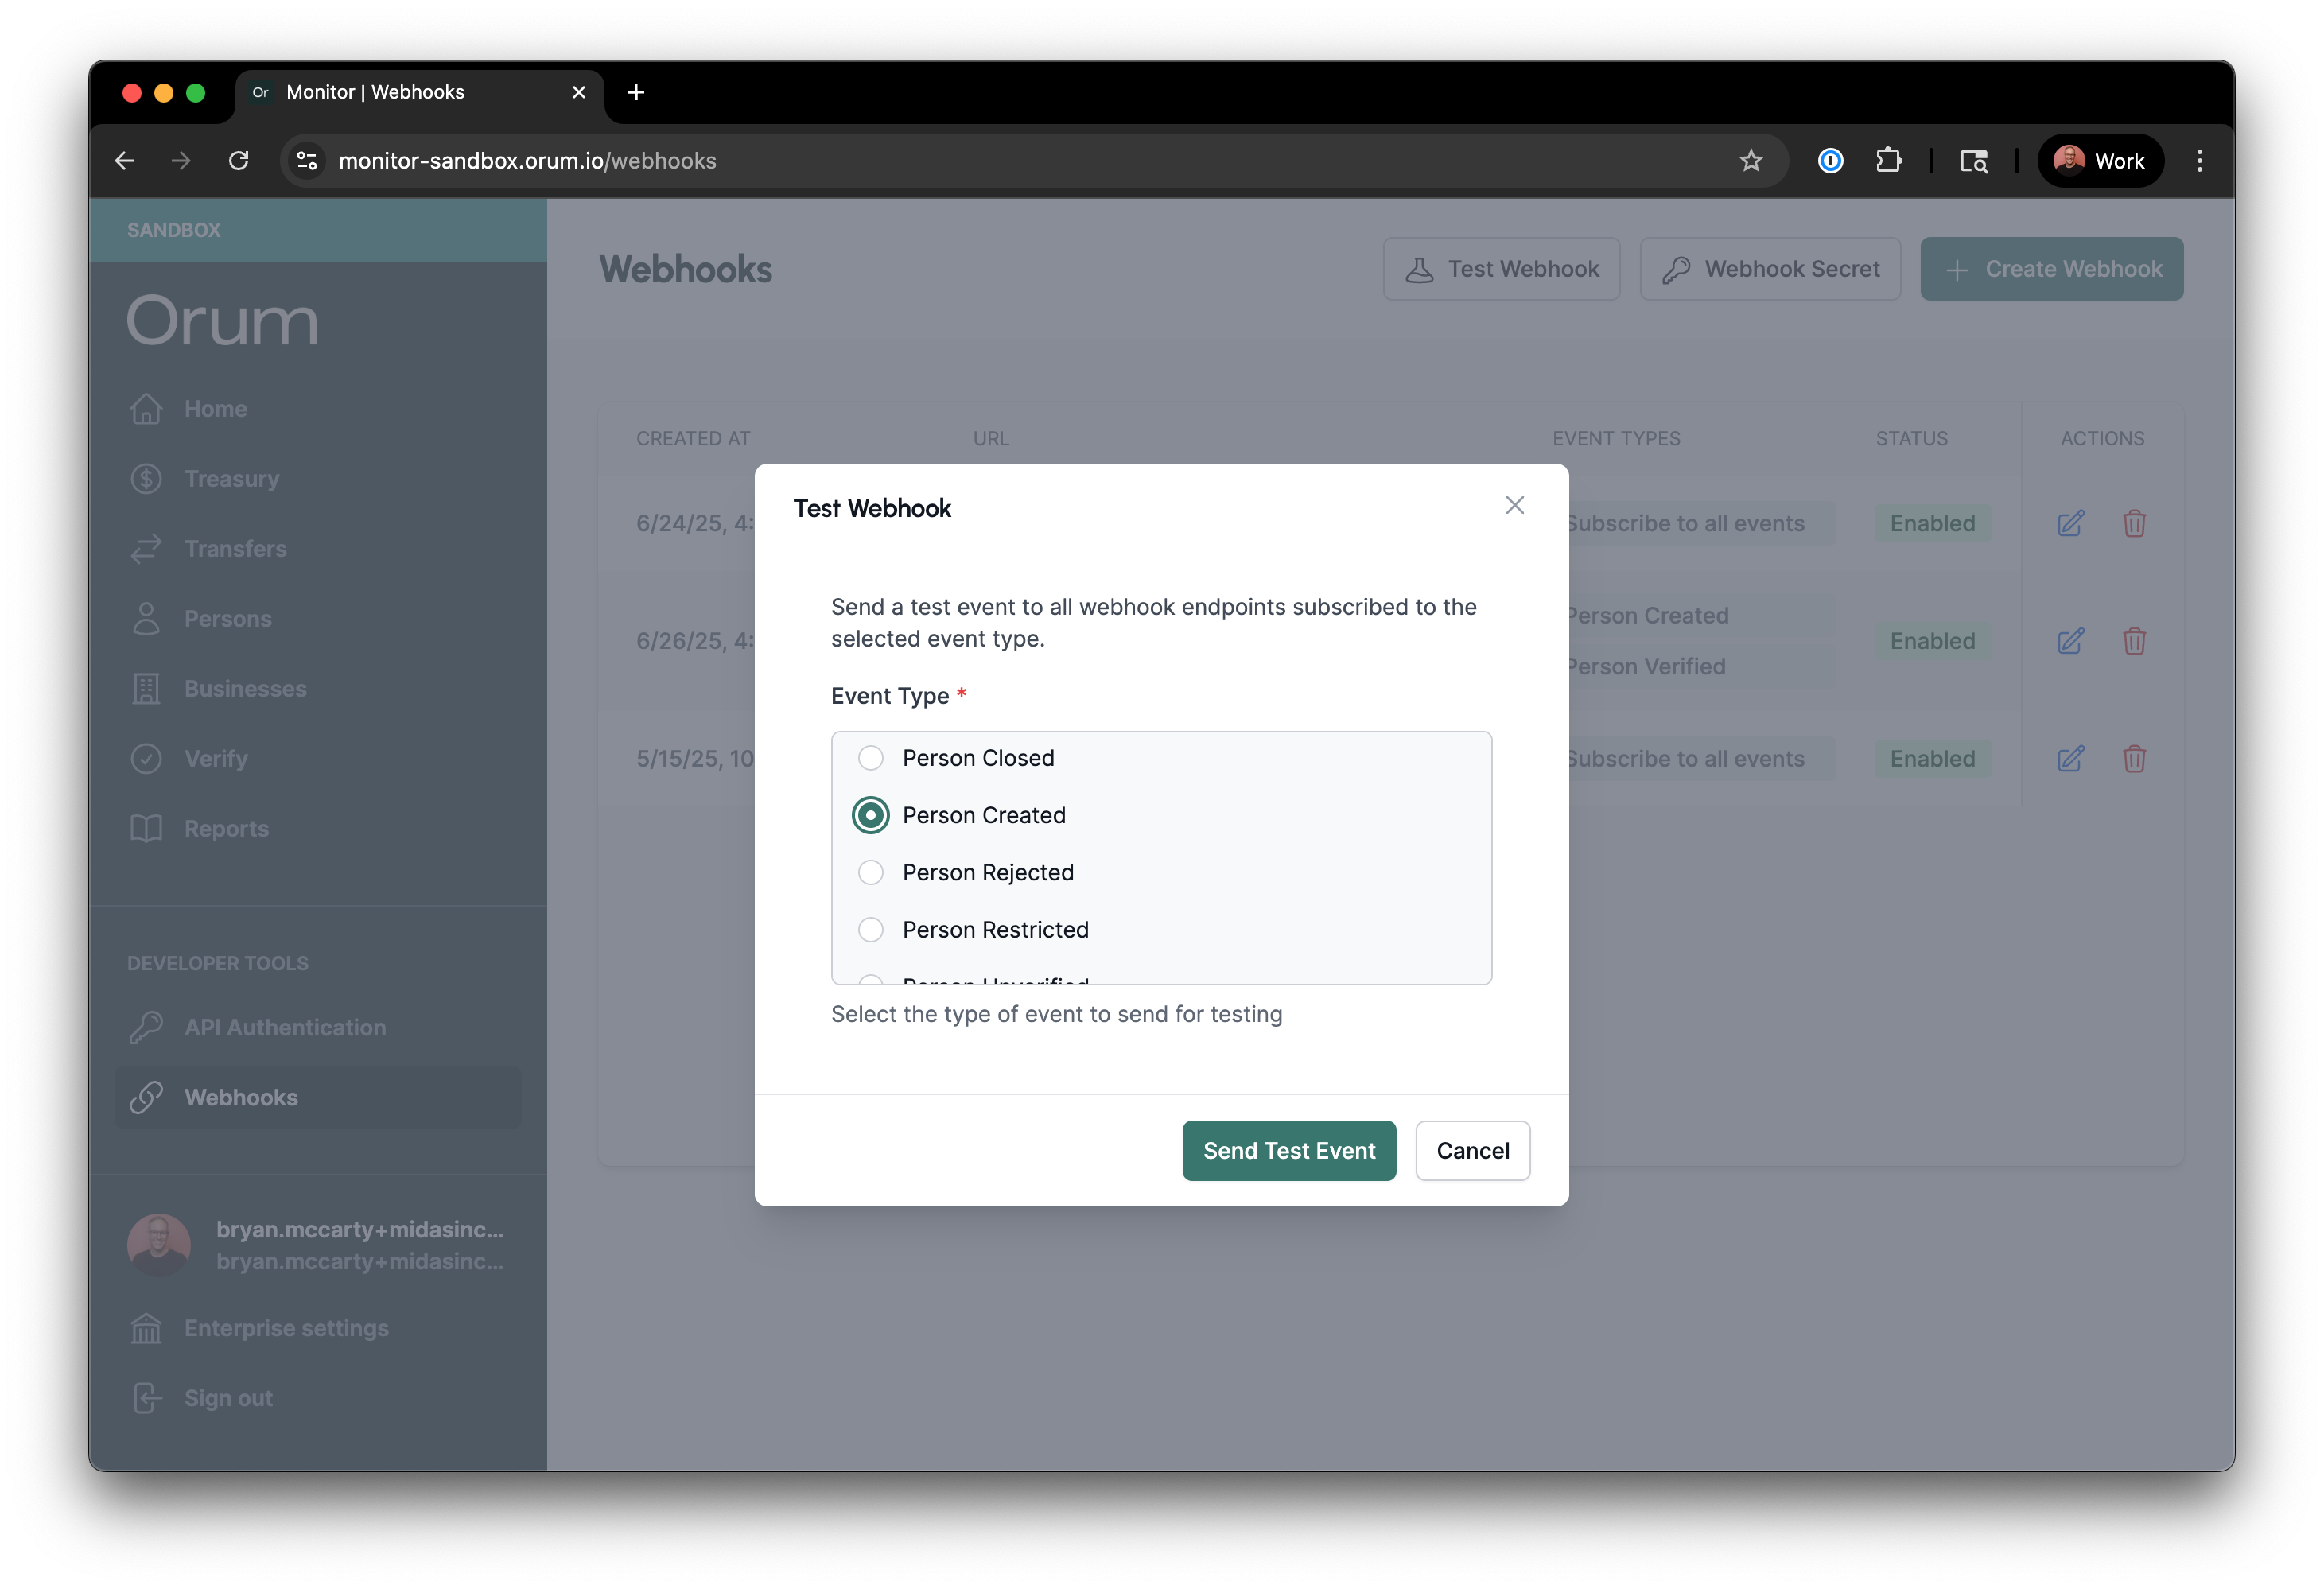
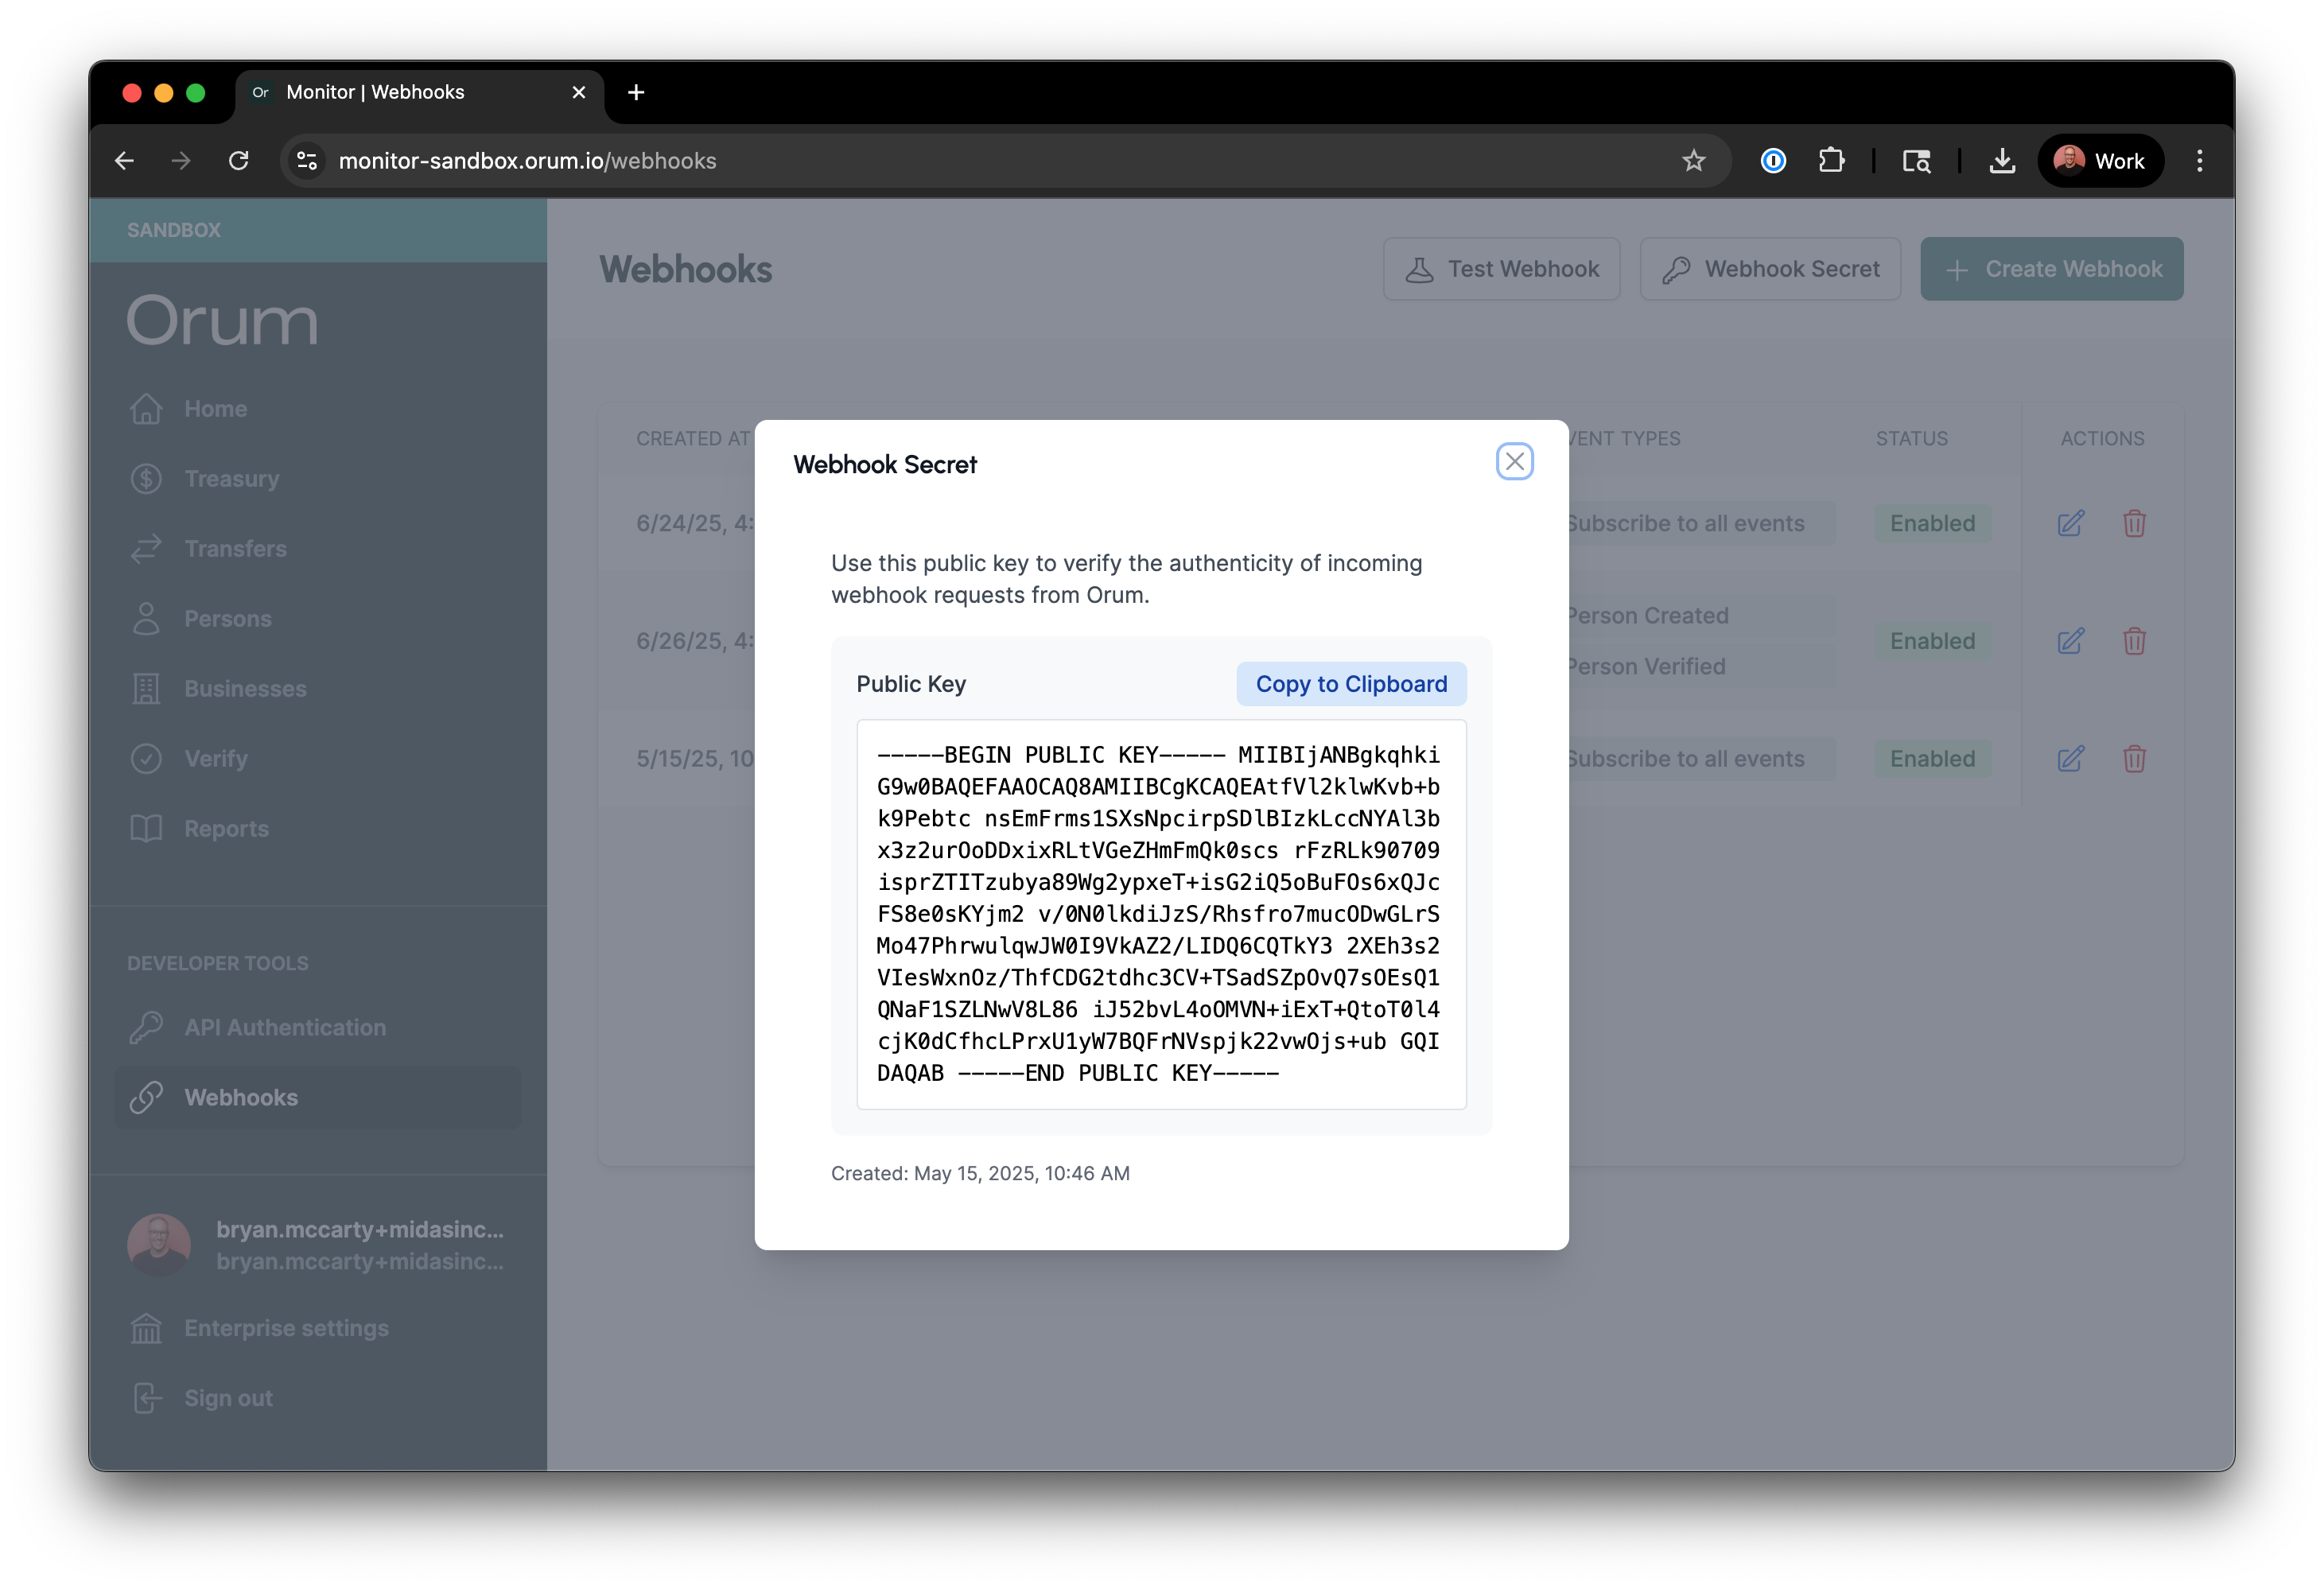
Webhook Security
- Orum will digitally sign each webhook request
- You’ll need to verify signatures on your server using the public key
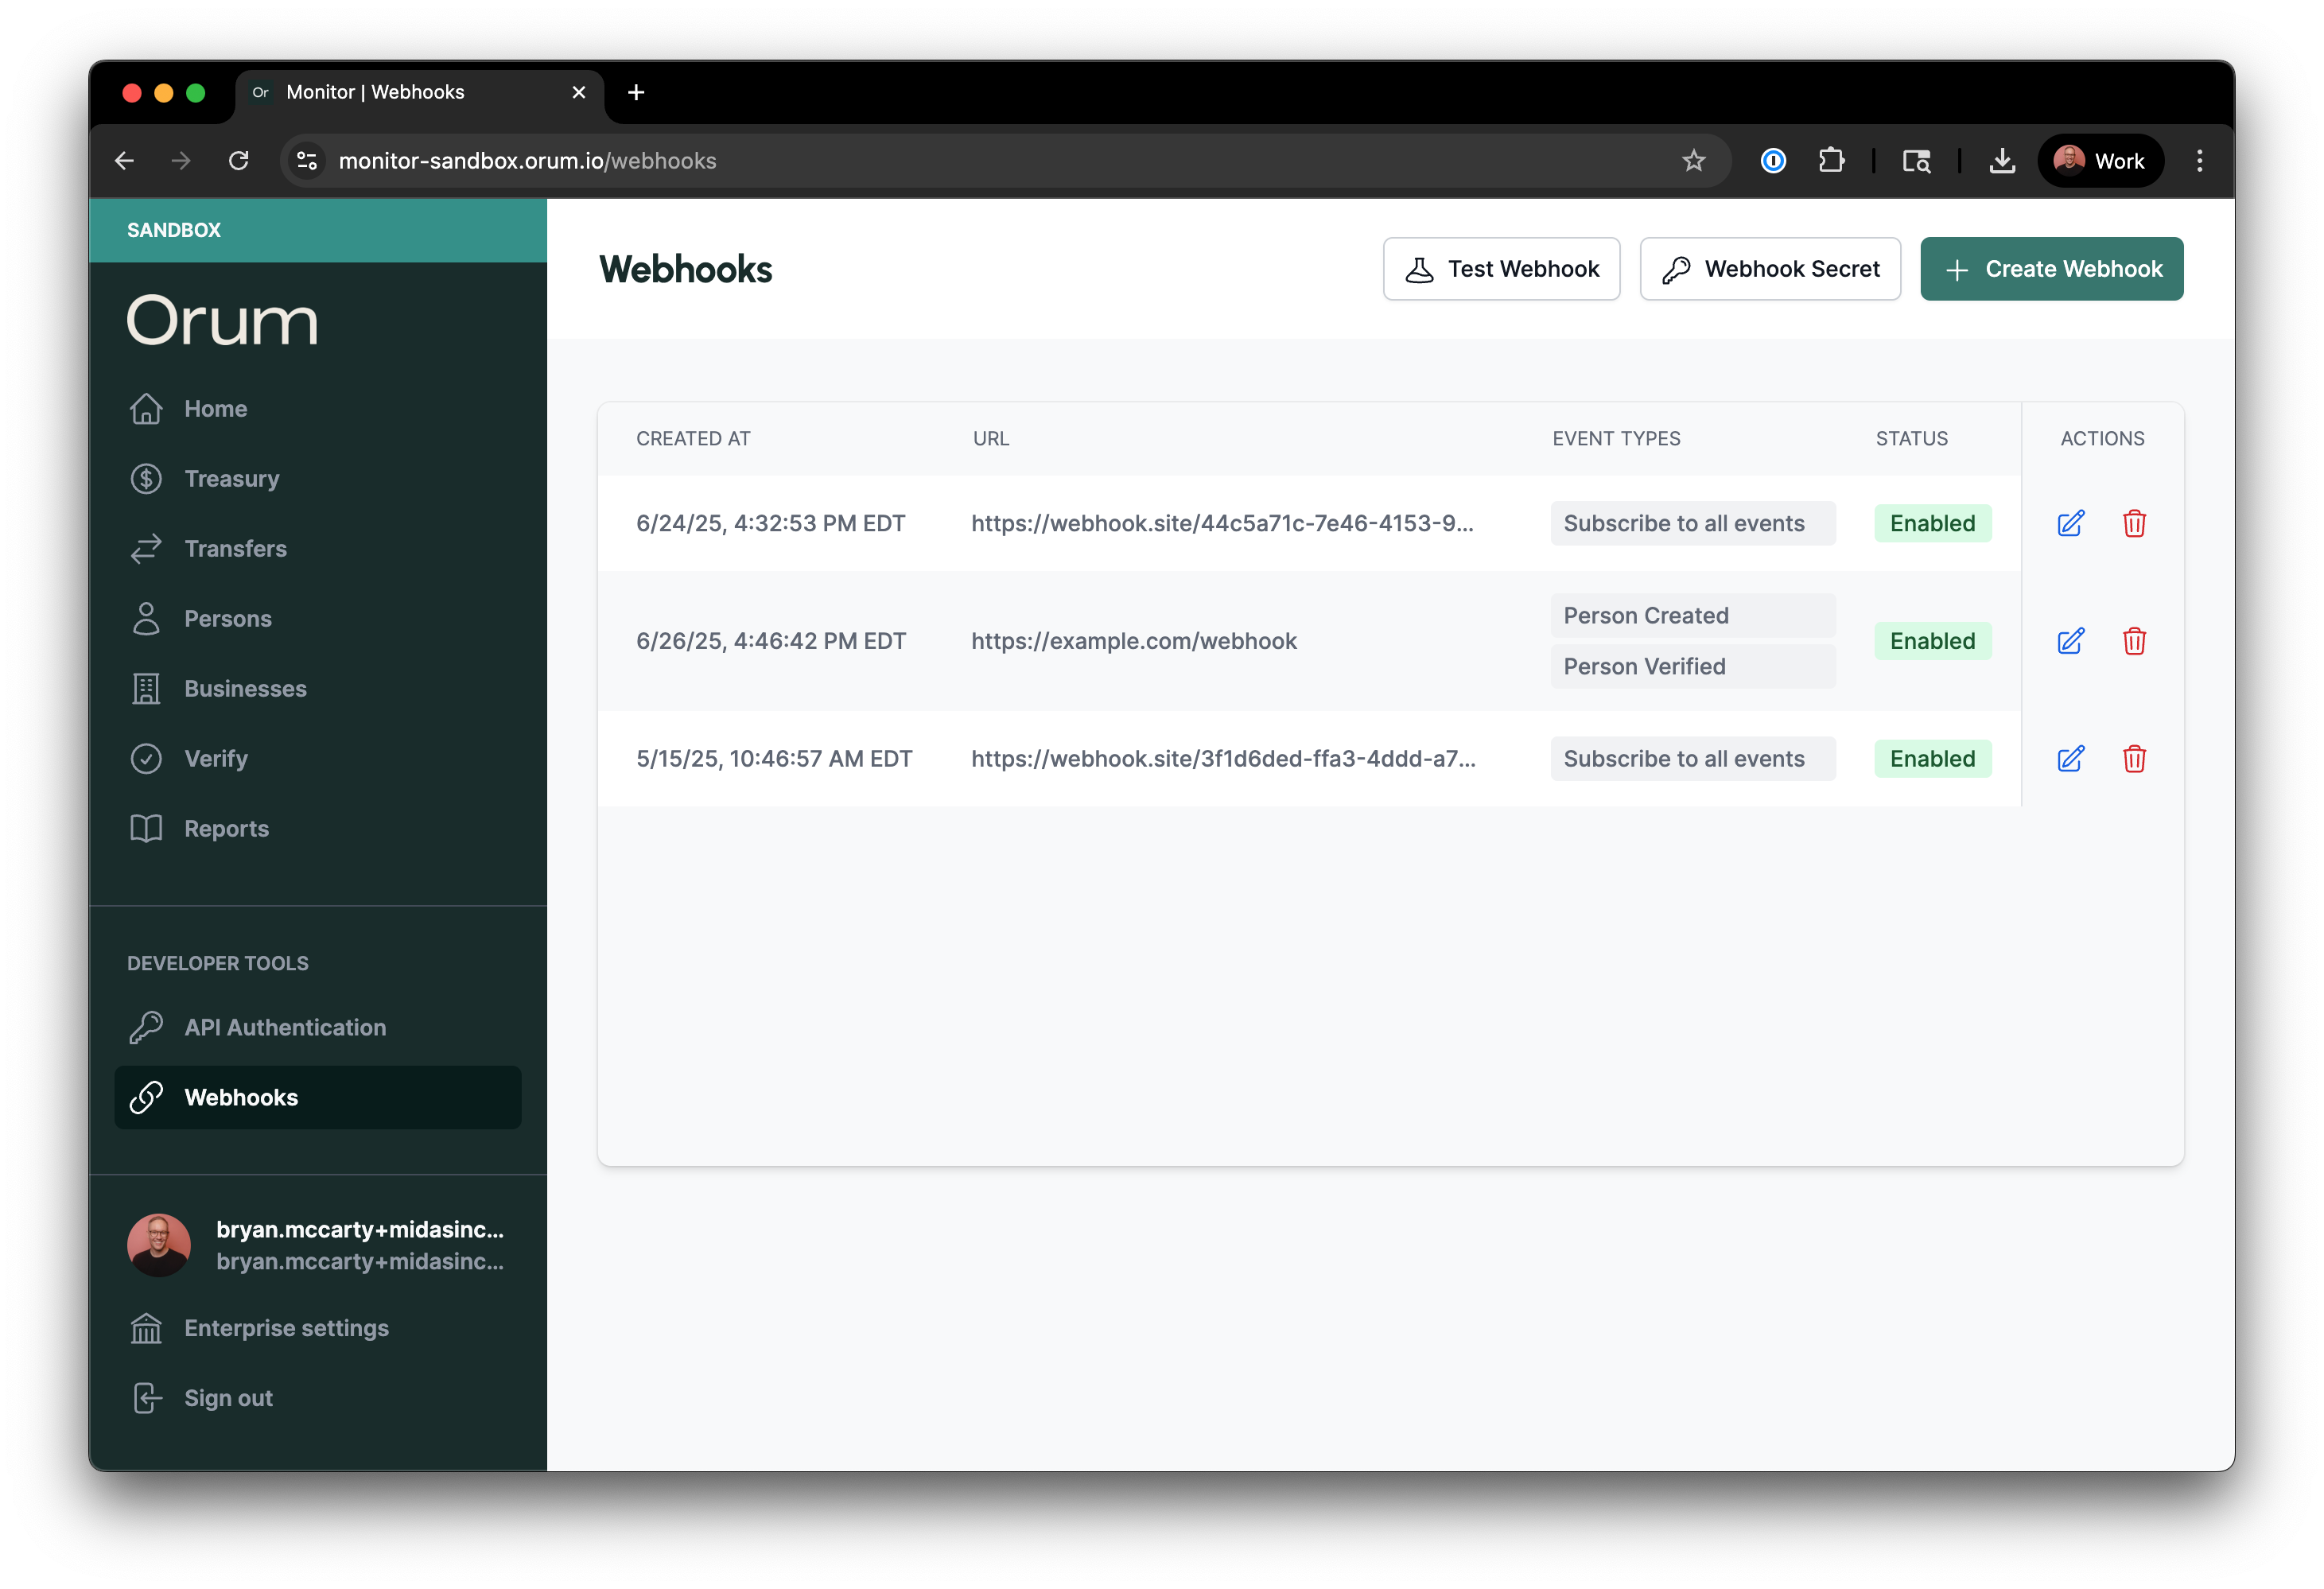
Manage Existing Webhooks
Each webhook configuration displays:- Created Date: When the webhook was configured
- Endpoint URL: The destination for webhook events
- Event Types: Subscribed event types
- Status: Whether the configuration is currently enabled or disabled
Update Webhook Configuration
1
Select Webhook
Click on the Edit icon on the webhook configuration you wish to edit.
2
Edit Settings
Modify any of the following:
- Endpoint URL
- Subscribed event types
- Enable/disable the webhook
3
Save Changes
Click “Update Webhook” to apply changes. The webhook will immediately use the new configuration.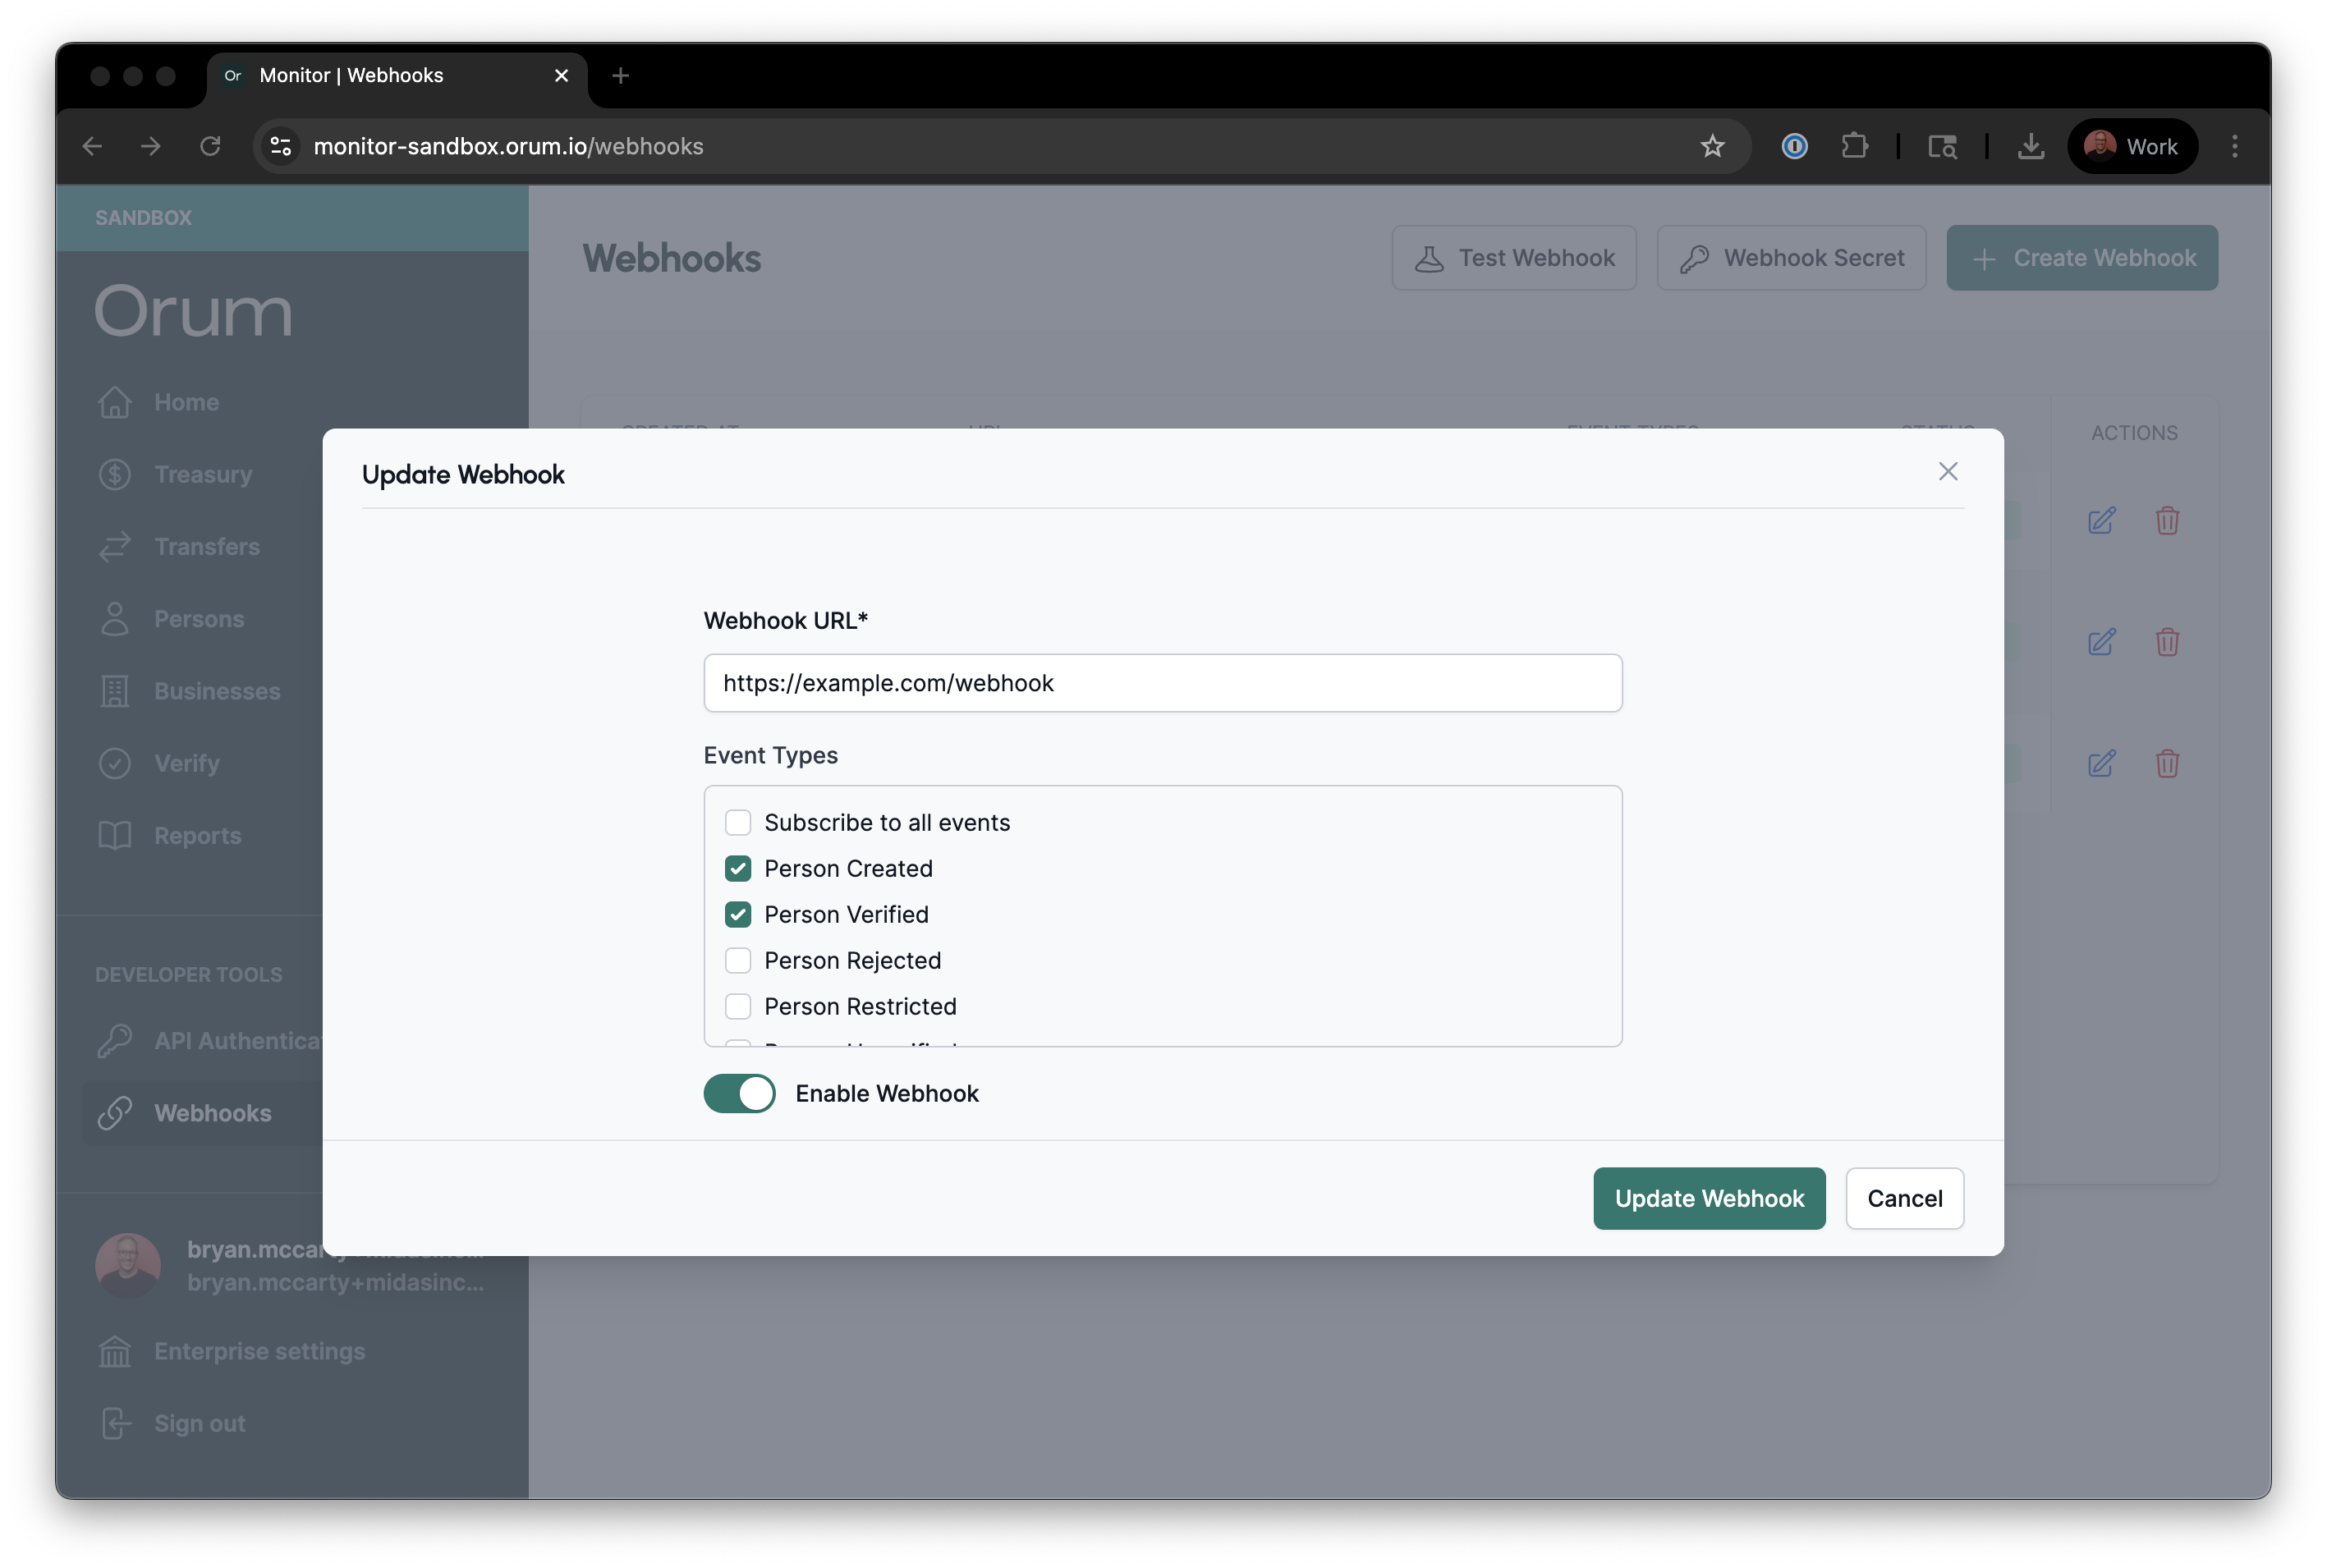
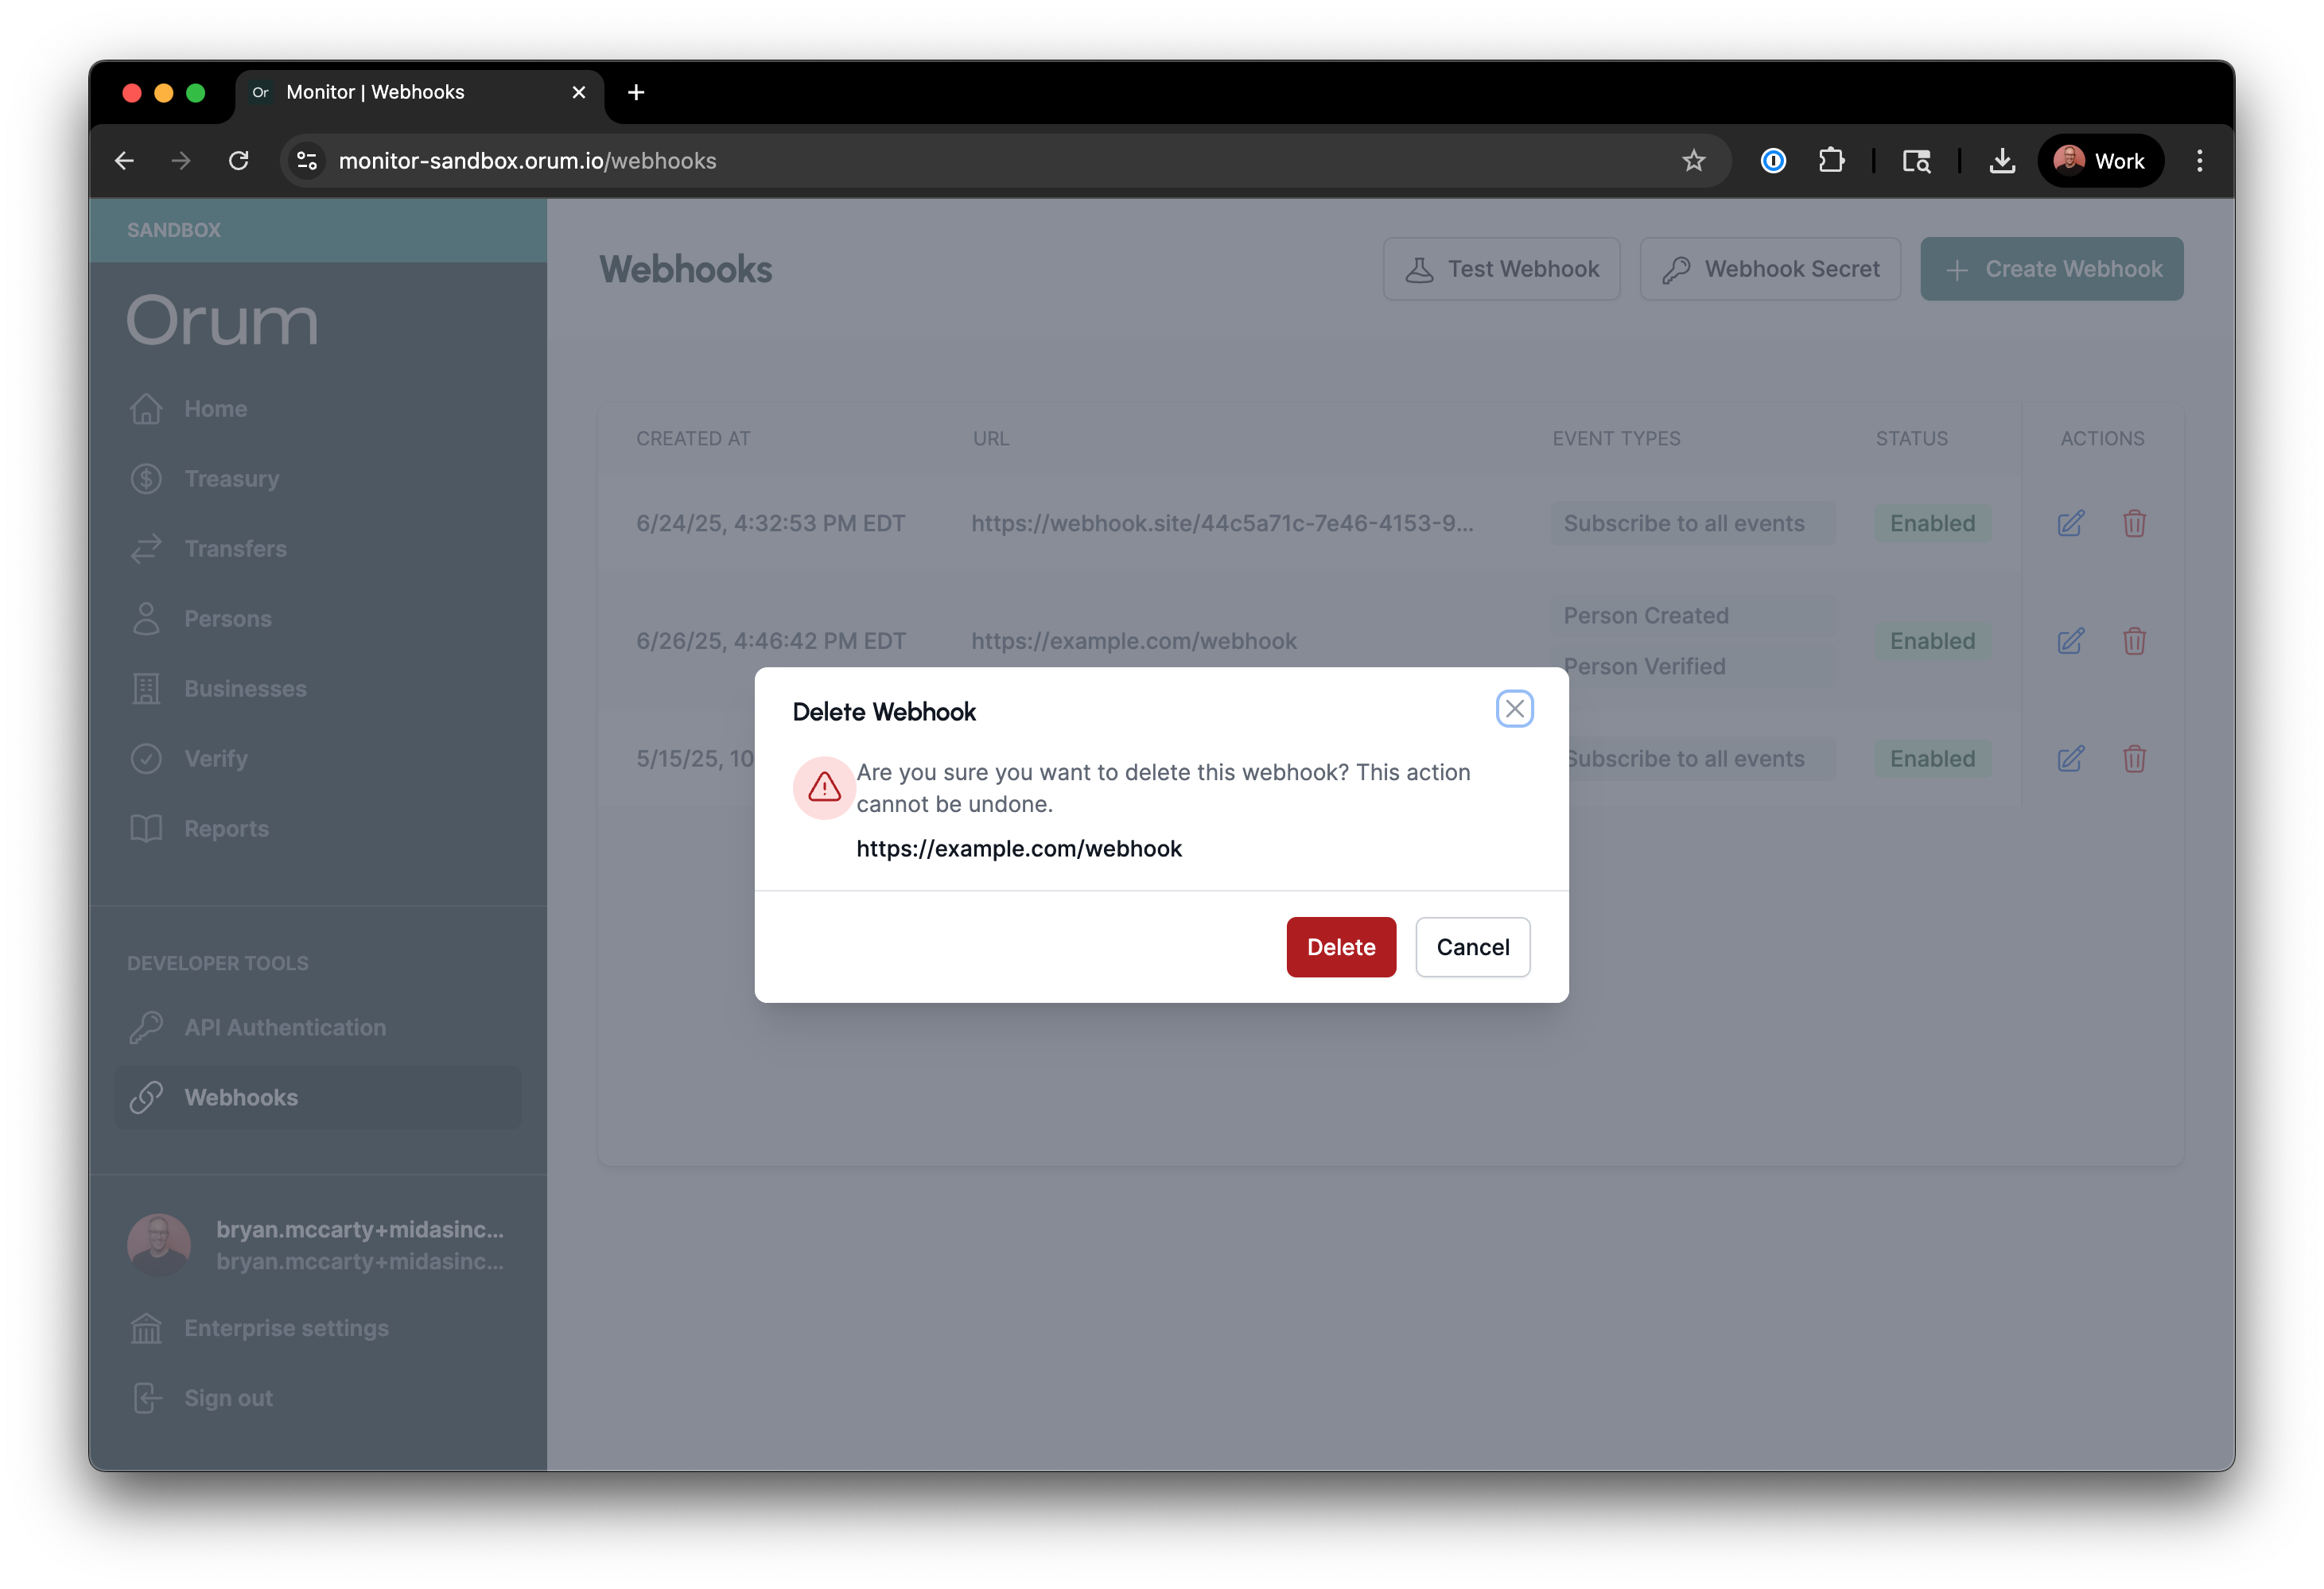
Delete Webhook Configuration
1
Select Webhook
Click on the Delete icon on the webhook configuration you wish to permanently delete.
2
Confirm deletion
Click the “Delete” button to confirm deletion.